Broccoli Bigger Than Your Head

A is for apple. Oh wait, that was the last post, and I still can’t get enough of them, but need to move along. B is for broccoli. As in broccoli bigger than your head. Ok, my head, I can’t really speak for yours.

For the past month, give or take, the broccoli at the farmers markets has not only been abundant but HUGE. Figuring that bigger is not always better, and the fact that I am not feeding an army (actual household: me, a husband and a dog who wants no part of a fruit or veg), at the market I go for the smallest head of broccoli I can find (which is not really saying much as all the heads of broccoli seem to be in the ginormous category) to which the particular farmer I was buying from tells me, “four bucks a head, regardless of size.” Alrighty then, decision reconsidered and swap for the biggest head of broccoli I can find, which wasn’t too hard. There said head sat, on top of broccoli mountain, like he was cannibalizing his fellow heads of broccoli until he alone was the biggest (ok, just gave the broccoli a gender. not sure if heads of broccoli have a gender. does broccoli have a gender? we head bigger heads than mine to answer this…whoa, reel it in, get back on track).

See broccoli is bigger than my head (and clearly hitting the Farmers Market at 6:30am = no glam

Regardless of size, and gender of, I find myself back home with a whole heck of a lot of broccoli. Tried some raw – nice sweetness, who said the big ones wouldn’t taste as good? Roasted some – dang did that up the sweetness, new fav’ way to eat broccoli. And…doesn’t even look like I have made a dent. Well I could break it up, vacuum pack and stash in the freezer to enjoy all winter. Or send some to George Bush Sr. No probably still not over his broccoli-aversion. No, think there is but one thing to do: make soup.

A good number of recipes I scanned all seemed to adhere to a three parts liquid, two parts veg and one part dairy formula for broccoli soup.  Well, when you are working with the world’s biggest head of broccoli soup rules are gonna get tossed out the window, or into the composter. Oh, and speaking of composting, or not wanting to compost the gorgeous radish greens, that happen to be laying on the counter, figured they would go into the soup as well. They’re green? Check. They’re good for you? Check. Into the pot they went and dang, if that wasn’t pure REVELATION (seriously, was not sure how nice they were going to play with the broccoli). Not only did they add nutrients but some major depth of flavor as well – pure genius (nod to the twitter peeps for pushing me to toss the radish tops in).

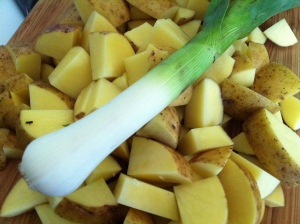
leeks for flavor boost and potatoes for ‘creamy’ factor

I was really really wanting to go the cheesy/creamy route, but needing to balance out the gelato intake (damn, I can’t get away from the stuff) I used a bit of potato to get to that creamy taste and feel. What do you know, it totally worked. Objective achieved and calories saved.

I don’t think I can subject you to a picture of the soup. Trust me on this, the taste is fantastic but the look? A hot mess of baby puke (sorry, I went there). And I don’t think photo shop or the best food stylist in the world can change that.

Broccoli (mainly) Soup

2 tablespoons olive oil
2-3 cloves of garlic, minced
1 large leek, sliced thin (no leeks? go with onions)
1-2 carrots, diced
8 cups broccoli, chopped (and that from one partially used ginormous head)
4 cups radish tops/greens, chopped
1 large potato, diced (skins and all)
salt & pepper to taste
3 quarts (if you like your soup thick*) veg or chicken broth.

Heat olive oil in the bottom of a large soup pot. Add garlic and leeks and sauté until translucent. Add carrots, continue to sauté approximately 5 minutes. Add broccoli and potato and, you guessed it, sauté some more (another five minutes). Add the radish tops and the broth. Cook down until all the veg are nice and soft.  Remove pot from the burner. Let it cool. If you have an immersion blender, no need to cool completely before pureeing the soup right in the pot. If you are using a blender or food processor, I would wait until the soup is completely cooled (to room temperature) before transferring (in batches) to blender.  Put the pureed soup back in the pot and add salt and pepper to taste. Reheat if eating immediately.
*After pureeing the soup if it is too thick, add more broth until desired consistency is reached.


Posted in To Market with Mo, Uncategorized | Tagged , , , , , , , , , , , , , , , | Leave a comment

No More Composter for You

Every Fall, one of my rituals is making/putting up, whatever you want to call it, applesauce. Nothing fancy, no sugar, just cooked down apples — ok maybe a pinch of cinnamon and a squeeze of lemon juice, but that is about it.

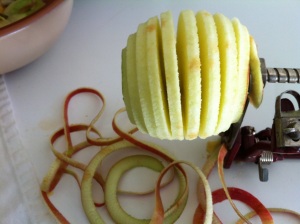
Peeling, coring and slicing alot of apples can be a pain in the neck…I mean hands. So thank  goodness for the handy old school slicer, peeler, corer all in one thing ma bob I bought at a farm stand 20 years ago. See  the picture below — this thing is da’ bomb.

The ‘Peel Away’ aka old school slicer, peeler, corer all in one thing ma bob


Serious entertainment for me I tell ya. I become completely mesmerized watching the apples become stripped of their peel and core all while being simultaneously sliced to perfection.  And the really cool thing, for me at least, is the one long curling strip of apple peel that is the result. I have always wanted to do something with the long strips of peel,  but always, into the composter they go. Okay in the past I have wrapped them into cheesecloth and then into a pot of cooking apples to give my apple sauce a lovely pink hue…well provided that apples I used were a red variety.

really long strips of apple peel

Not this year. No. No composting (ok some went that way).  After briefly seeing somewhere online (dang, wish I could remember now, cause I need to thank who ever posted and inspired me) I came across apple skin crisps/chips (shoot again short term memory fail and can’t recall what they were officially called). I did recall that the peels were just cooked plain, low and slow in the oven. Or that is all that I could recall. I thought I would take my inspiration one step further – add a bit of olive oil, a sprinkle of cinnamon and sugar, and then into the oven low and slow. Opps, impatient girl that I am (what, I had an apple crisp waiting to go into a hotter oven and I only have one) bumped up the temp at the end, maybe took much too soon but the result? OMG. New favorite sweet snack. Gelato move over, we need to ‘break up’ for a while anyway. Crunch and sweet factor all rolled into one. Perfect. And not feeling nearly as guilty as polishing off a bowl of my ex, gelato.

Apple Peel Crisps

my extra crispy ‘apple peel crisps’

-strips of apple peel that you were otherwise going to scrap after prepping apples for pie or sauce (at least enough to fill a baking sheet)
-1/2 to 1 tablespoon of olive oil or canola oil
-1 tablespoon of cinnamon sugar (I made a batch using ratio of 2 parts sugar to 1/2 part cinnamon)

Preheat oven to 250 degrees. Carefully toss apple peel strips with oil and then cinnamon sugar. Place in a single (or close to single layer) on baking sheet. Bake in oven for at least an hour. Really depends on how crispy you like your crisps. I let them bake for two hours. Let cool completely – they seem to get crisper as they cool.


Posted in To Market with Mo, Uncategorized | Tagged , , , , , , , , , , , , , , , , , , , | 2 Comments

Latest Fashion Statement: Kale Pesto

Fashionwise (yes, there is something I love almost as much as food and going to the Farmers Market), this past (insert sad face that I am already referring to summer as past) summer season, and trickling over into the Fall, I am obsessed with stripes. Oh and blue and green nail polish (never would have predicted that, she of the classic ‘ballet slippers’ and ‘vamp’ – sorry gentlemen, but the ladies know of what I speak). But, back to the kitchen, I will deem the Summer and Fall of 2012 the season of the food processor, more specifically: season of the pestos.

Yeah yeah, I know I have posted more than once, or twice, about pestos, but dang after a hot, not-turning-the-oven-on season and then an abundance of herbs and greens that loved said season, my food processor has been getting a workout (to the tune of opps, I seemed to have melted the arm of the grating blade attachment . donations being accepted). Last year’s cooler and wetter than normal summer resulted in a paltry, if any of my heat loving plantings ability to provide any type of ‘crop. Fast forward to this season and DANG, the basil, shiso and arugula have taken over. And will save the ‘sage that never died off’ for it’s own post.

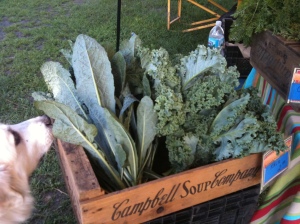
Now being that I have droned on before about the arugula, shiso and basil pestos (trust me, making them like crazy this year), and was looking for something else to whirl into a pesto frenzy, I went to the market and then honed in on…kale. Yes, you read correctly and before you make that scrunch-face stay with me (heck I think I have convinced you to delve into kale before: note chips and raw salad), you are so going to be hooked on kale pesto.

I must be honest, and cannot take credit for this genius use of kale…no, no, no, that I bestow upon a fellow-member of a facebook food group (me a member of a food related group? Shocking. I know.). Cruising the info highway and lo and behold a bagillion recipes for kale-based pestos (where have I been?). I do love me some kale, but I was getting tried of all my standbys: juicing, chips, salad, sauteed, so the idea of a pesto incarnation came just in time.

A natural as a pasta sauce, but digging this pesto as a topping for pizza, crostini, slathered onto chicken breasts (or under the skin of whole roasting bird) and schmeared onto fresh bread. Oh heck, it’s tasty right from the spoon. No, it will not replace peanut butter.

Kale Pesto

2 cups firmly-packed, fresh kale (stems/spines removed)
1/2 cup pine nuts (or almonds, or walnuts)*, toasted
3 cloves garlic
1/2 cup (give or take) extra virgin olive oil
1/3 cup parmesan cheese, grated
pinch of salt
squeeze of lemon

Put all ingredients, sans the olive oil, into the bowl of a food processor (or blender) and whirr away. Once nice and broken down and combined, with food processor running, begin to stream in the olive oil until desired consistency is reached – hey some folks like their pesto stand-a-spoon-in-it thick and some like theirs on the soupy side. Your call.
*or use a combination of nuts. last batch I used all three. heck, why not.

Posted in To Market with Mo | Tagged , , , , , , , , , , , , , , , , , , , | Leave a comment

Where Have You Been All My (Cooking) Life?

The workhorse all instagrammed

For someone that has been cooking as long as I have, and is a pretty good cook at that (so I’ve been told), it is hard to admit that I have spent the majority of my cooking life without a cast iron skillet. WHAT?!? Yes. I. Said. It. Most of my cooking life. The cast iron skillet did not make an appearance until six months ago. Oh, my long lost friend, how have we not been together for so long?!?

Living without a dishwasher (husband aside – I am referring to the electric appliance version) is one thing, but no cast iron skillet? I must now admit: unacceptable. It is one of the true workhorses of the the kitchen. And unlike that knife set, that is almost a mortgage payment, ye ole cast iron skillet will put you back about $20 and outlive you on top it (provided you take care of it, but we will get to that).

Not sure if it was a craving for fried chicken, and reading that a cast iron skillet is ‘the only way to fry chicken’, or the novel idea (thank you Martha. yeah Stewart. first name basis don’t you know) to make pizza in said skillet, that prompted the run out to Target to purchase one. Yeah, no need to order online (thank god, that would cost a small fortune. p.s. they are heavy), or go to a fancy cooking boutique (ala Sur la Table). Heck, back in the day the cast iron skillet was a stock item at the ‘general store’ or ‘Five and Dime’.

Unlike what you would have picked up at the ‘general store’ most cast iron skillets (pans or dutch ovens as well) come pre-seasoned. Phew, lazy girl here is all about saving extra steps. And speaking of saving steps — no washing! Ok cleaning, but that usually means wiping clean with a cloth or paper towel, rubbing with some vegetable oil and putting away. Of course if you do have a bit more mess (say from caramelizing sugar for the upside down cake I mention below), try heating the pan, adding some salt, and rubbing with  soft cloth (or paper towel. hey, it worked for me) until the salt picks up all the leftover gunk. Worst case, under the water with a sponge it goes, but resist temptation to use soap as it can ruin the ‘seasoned’ finish. And for the love of all that is holy, dry the skillet ASAP – you dont want to deal with rust.

not enough peaches and too many plums? caramelizing away in the skillet.

Well I didn’t make the fried chicken (still avoiding the temptation) or the pizza (stuck with pizza stone with that one). The first thing I did make was potatoes. OMG, life changing. So simple. And a quicker fix than roasting in the oven and if you are like me and like your spuds soft on the inside and uber-crusty on the out, then the cast iron skillet is the way to go. And don’t even get me started on brussels sprouts – oh my heck, once again, oh did I live so long without you cast iron skillet?!?

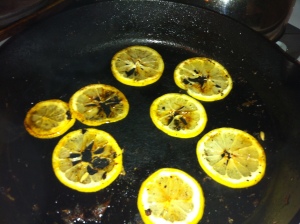
Yes, even lemons have gotten the cask iron skillet treatment

Sadly though (for my waistline, not my tastebuds) the thing I having been making the most in the cast iron skillet of late is variations of Martha’s Peach and Cornmeal Upside Down Cake. If you are a fan of not too sweet desserts, this cake is for you. I have followed the recipe to a ‘t’ as well as strayed (cuz god forbid I leave a recipe well-enough-alone) off into using other fruits of the season (hello Stanley plums, nectarines, blackberries, apples), swapping lemon thyme or rosemary for the lavender (though gotta tell ya, loving the flavor the lavender infuses), or swapping yoghurt for the ‘opps, didn’t have on hand’cream. Speaking of the yoghurt, a dollop of it makes a great addition to a slice of cake. Well that or a scoop of vanilla ice cream…just sayin’.

the beginnings of the upside down cake: peaches, cornmeal and lavender

Martha Stewart’s Peach Cornmeal Upside Down Cake

* this cake is a great way to use up those mealy peaches that are just nasty to eat as nature intended.

Posted in To Market with Mo, Uncategorized | Tagged , , , , , , , , , , , , , , , , , , , , | 5 Comments

I’ll take those stems

Just when I thought it was all over, and best not to even tell you about until say next season, I found more garlic scapes this week! Really? That worthy of an exclamation point?  To me, yes. This season I cannot get enough of those serpentine-looking tops of the hard neck garlic plants.

Yeah yeah, early spring we all go gaga over one of those first signs of Spring (and that we will once again be hitting the outdoor farmers markets): green garlic. Those tiny, tender shoots of garlic that had to be thinned from the field (yay for those of us that geek out over it). Then about a month later, when the excitement of the green simmers down, the scapes of the garlic plant begin to appear at the market. These are not the leaves of the plant, but more of the ‘flowering’ (doesn’t really flower in this case) stem of the garlic bulb. The scape is typically lopped off in order to let the plant put it’s energies into producing a larger bulb of garlic, all the more cloves for your enjoyment later in the season.

So the scape frenzy typically, short and sweet as it is, starts late Spring and goes until early Summer. And this season, instead of just using them chopped and tossed into salads, eggs, dressings, and quite frankly in most ways I would use garlic, I went a bit over board purchasing them (say nothing my market-going enabling friends out there. yeah, you know who you are). Well let’s just say, like the abundance of arugula, basil, sage, and shiso in my yard this year the garlic scapes were made into vats (ok, maybe jars) of pesto.

Scapes, Almonds, Pine Nuts, Parmesan – main players in the pesto…well sans the olive oil, who plays a pretty big role

You would think one would get tired of so much garlic consumption (trust me, it was scary, I was putting it on everything except maybe ice cream), but no. And just when I resigned myself to no more scape pesto till next season, voila, there was a pile of it at the market on Wednesday (Thank you Leaning Shed Farm). I guess in this crazy growing season nothing should shock.

So if you are out at the markets this week, keep your eyes peeled for the garlic scapes. Whip up some pesto. And like me you will want to put it on everything. Ok, maybe not everything, but crostini, pizza, as a pasta sauce, in eggs, sandwich condiment…you get the idea.

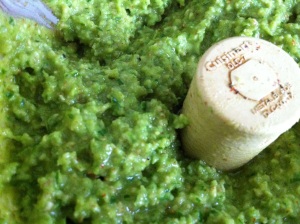
Fresh Garlic Scape Pesto. You know I started eating it right out of the food processor bowl

Mo’s Garlic Scape Pesto
1 1/2 cups chopped garlic scapes (with the ‘flower’ pod removed)
1 cup chopped almonds or pine nuts (or in my case a combo of both)
1/2 cup parmesan cheese, finely grated
1 cup extra virgin olive oil
1-2 teaspoons fresh lemon juice
salt and pepper to taste

Combine the garlic scapes, nuts, and cheese in a food processor. With processor motor still running slowly stream the olive oil into the mixture. Then add salt and pepper and the lemon juice.  Scrape mixture into jar and keep in the fridge for a week (honestly I have gone longer when the batch has been doubled…or tripled ;).


Posted in To Market with Mo | Tagged , , , , , , , , , , , , , , , , , | 1 Comment

Kofta-Keftdes Mash-up

Great Pyrennes guard lambs (well some do) read the post, you’ll get the reference

Oh sure, deciding to use the stovetop on the hottest day of the year, without having a ‘freezer burn’ level of air conditioning, might not be the smartest idea, but when you trumped preparing the ground lamb you thawed over the weekend as planned, needed to cook it, stat. It’s bad enough when I forget about fresh produce from the market in the fridge and have to throw it out, but the thought of having to toss 2 lbs of farm fresh ground lamb? Crying jag would ensue.

Without ‘grill man’ (insert husband here) around (yeah I can grill, but don’t like to step on his domain), needed to go with the indoor cooking. So it’s meat. But needs to be cooked fast, elst no air conditioning in the world will cool things down. Hummmm. Got it, keftdes. Say what? Little ‘Greek’ meatballs that are a favorite meze (tapas, appetizer, you get the idea) in Greece, that combine meat (lamb my fav), spices and onion.  All this should take under 10 minutes in a skillet. Yep, that’s bearable on a 95 plus degree day.

(Little secret for those that don’t know me, I LOVE the heat, so maybe even that 10 minutes at the stovetop would be too much for those of you a bit more intolerant of the heat, just sayin’)

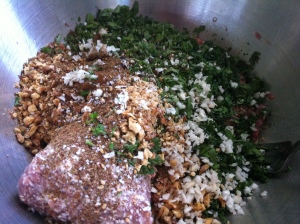
all ingredients ready to be mixed. gone on, get your hands in there.


What started out as straight up keftdes, became a bit more fusion, more of a keftdes meets kofta (middle eastern meatball). Having made them before, but wanting to change it up a bit, I read through a number of recipes. What happened, per usual, is a little bit of this and a little bit of that from a number of recipes, and what resulted is my own version of a Mediterranean-Middle Eastern meatball. Served up with a squeeze of lemon, some homemade tzatziki (the cooling element on the hot day), and a glass of rose -’tis the season after all.

formed meatballs, ready for the skillet

Mo’s Mediterranean-Middle Eastern Meatballs
1 lb ground lamb (used both Mint Creek Farms’ and Catalpa Grove Farms’)
1 teaspoon dried oregano
2 tablespoons finely chopped fresh mint
2 tablespoons finely chopped fresh parsley
1/4 c chopped onion
1/4 c white bread crumbs (dry or day old)
1 egg, lightly beaten
2 teaspoons finely chopped green garlic (regular garlic or dried will sub when green not in season)
2-3 tablespoons toasted walnuts or pinenuts, chopped (nut allergies? omit)
pinch each of cumin and cinnamon
1 tablespoon fresh lemon juice
1 teaspoon Za-atar blend (love that add of sumac and sesame)
salt & pepper to taste
1-2 tablespoons olive oil
1-2 tablespoons pomegranate molasses (for brushing on cooked meatballs)

have I been mis-spelling or…

lemon wedges (for serving)

just about done

Combine all ingredients (sans the olive oil, pom molasses and lemon wedges) in a large mixing bowl. Don’t be shy, use your hands to really get everything evenly mixed. Back to the hands, form small meatballs, say about 1 1/2 to 2 tablespoons of meat mixture. Once meatballs are all formed, heat some (1-2 tablespoons) of olive oil in a large skillet, over a medium flame. Place meatballs in the skillet, turning them over after about 2-3 minutes. Another 3 minutes and they should be done.

Place on paper towel covered plate to drain oil.  Immediately brush with some pomegranate molasses (shout out to NY Times Dining Guide for that idea). Serve with lemon wedges.

Posted in Uncategorized | Tagged , , , , , , , , , , , , , , , , | Leave a comment

One gal’s weed is…

Image..well quite frankly, this gal’s arugula.  Enter my backyard this time of year and perennials are pushing thru the ground, large pots are waiting to be potted (or, are attempting lettuces, chard and kale before summer hits full blaze, oh wait, it did), and then there is what looks like the ‘land o weeds’. Closer look and there is quite possibly the kickiest naturalized arugula in the city.  This is all a result of planting some ‘wild’ arugula (from plants found at the farmers market of course 😉 years ago and just letting them go to seed year after year.  So if you are in that part of my yard, resist your urge to weed,’k?

Wow, just realized I opened myself up to all of you coming over and begging arugula off me.  A little push back here, I am sending you off to the farmer’s markets.  Asparagus and strawberries might get all the attention this time of year, but this is prime time for arugula folks.  To think, prior to the early 90’s most folks had no idea what this peppery, mustardy, cress-like, perfect-addition-to-almost-everything (in my book as least).  And now everyone knows or has tried it.

Now your ‘grocery store’ variety is pretty darn tame (putting it ever so nicely), and easy to dive into alone (think simple salad of arugula, shaved parmesan, a drizzle of olive oil, and squeeze of lemon), but real farm fresh arugula let me warn you: proceed with discretion.  Not to scare you off, but it can pack quite a punch.  Kind of like Altoids.  Yes, you know what I am talking about.   Add these peppery-sweet (hum, is that possible?), vitamin-rich greens to a favorite salad or pasta, top off a pizza, stuff into sandwiches, mix into quiche or ,swap for basil, to accompany prosciutto and melon. Seriously, wow good.

If you are like me and have an abundance of arugula (gee, I would never buy more than I need at the farmers market, must be someone else), a great use, that will keep on giving for awhile, is pesto.  Think basil pesto, but with a lot more bite.  So, so easy to mix up a batch, then store it in the fridge for a couple of weeks, or store in the freezer and you will have some for months.

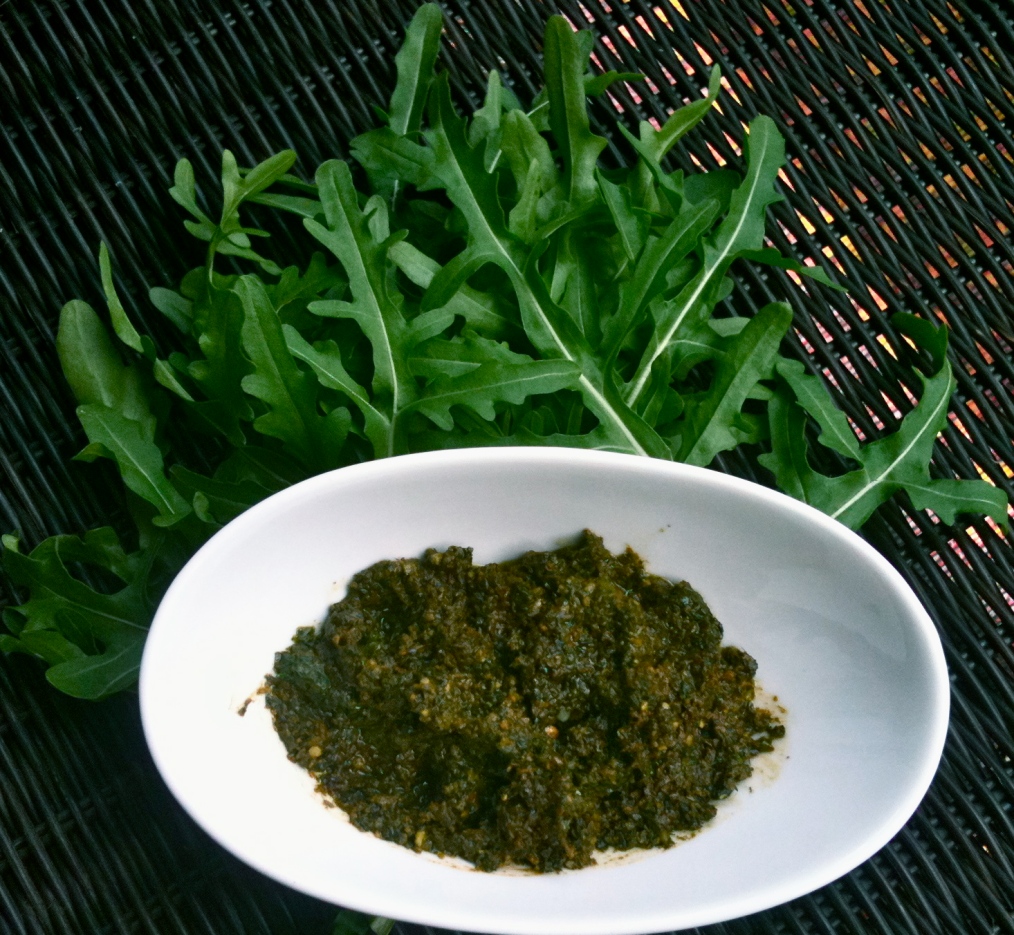
Arugula PestoImage

3 cups packed arugula
1/3 cup pine nuts (or walnuts), toasted*
1/2 cup grated parmesan cheese
1/2 teaspoon salt
1 large garlic clove, chopped
3-4 tablespoons olive oil

Pulse everything, except the olive oil, together in a food processor, until the arugula is chopped fine.  With motor running, stream in the olive oil blending mixture until smooth.
Store in fridge covering the surface with plastic wrap (trick for keeping surface from discoloring), should keep for one-two weeks.
* nut allergies, or plain just don’t like them?  Eliminate them from the recipe.

See you at the markets!

Mo

Posted in Uncategorized | Tagged , , , , , , , , , | 1 Comment

Pizza becomes flatbread

ImageEnough with the pizza dough already you say?  Needless to say, in a house of two who can’t seem to cook for less than ten there was pizza dough for days (reference my last post when I was only on day four or so). And with a request from the twittersphere (shout out to @FennelFriday) I am sharing my version of a caramelized fennel flatbread. 

After a week in the fridge my pizza dough was really nice and relaxed. So much so I could press it right into cracker thin submission. Oh, so then it’s not pizza and now flatbread so couldn’t possibly be sick of pizza – oh, sorry for sharing the chatter in my head

After going overboard with using fennel as a juice ingredient, it was time to reintroduce it to the sauté pan, to get it nice and sweet and caramelized. Team it with fav topper of the moment for moi, lemons and this is the result…

Caramelized Fennel FlatbreadImage

1 ball of pizza/flatbread dough (last post for recipe)
1 Fennel bulb, thinly slice and reserve some of the fronds for garnish
1 lemon, sliced thin, thin, thin
1/2 cup (or so) kalamata olives pitted and cut in half
1/2 cup fresh mozzarella, sliced (no strict rule here, go with goat cheese, feta, or what you fancy)
generous pinch of thyme
extra virgin olive oil to drizzle

Preheat oven to 500 degrees. Heat some olive oil in a sauté pan or cast iron skillet, add sliced fennel and just let it cook low and slow until it gets nicely caramelized. Season with some salt and pepper. Remove from stove and let cool.

Roll or press out dough (round, rectangle, free-form, or whatever floats your boat shape) . Place onto baking sheet (or pizza peel if putting onto a preheated pizza stone). Scatter the fennel on the dough, followed by the lemon slices, olives, cheese, thyme and then finish with a drizzle of olive oil (if you have a lemon-infused version go that route, you won’t regret). Bake for 5-7 minutes depending on your oven and how ‘cooked’ your like your flatbread. 

Posted in Uncategorized | Tagged , , , , , , , , | Leave a comment

it’s flour and water and…yeast.

This winter I came to the realization (after how many years together?!?) that my husband loves pizza. Rightfully so, who doesn’t? But gotta say, for years, though I like pizza, it was not a LOVE thing that I had to have weekly or monthly for that matter. Said husband on the other hand could eat it weekly. And this girl who has spent the majority of her life in the Midwest is still a native New Yorker at heart. Yes, that means I love a New York style pizza. And if I can’t get that than Neapolitan, nice and thin and crispy, with a bit of chew is my preference. My apologies to all makers of Chicago-style, it’s just too much dough and cheese for moi.

After ordering a delivery pizza, a request by the pizza loving-mate, paying well over $30 when all is said and done, waiting for what seems like forever (hey when you are hungry an hour is eternity), and at the end being under-whelmed, thought, I need to do this myself. Yes, I can cook with the best of them (alright maybe not THE best, but I can certainly hold my own) but there has been something about making, and baking, anything that involves yeast. Quick breads, no problem (you did read my last post right?).

the beginning: flour, water, yeast

There is something about those living breathing minuscule grains (micro-organisms) that just intimidate the heck out of me. Stayed away for years. Until this winter. Paying too much for ‘za and for bread I had to get over my fear. I mean it is basically flour, water, and yeast right? I can do this. And I can do this for pennies.

The other thing about yeast, is that you have to plan ahead. There’s no, oh I feel like making pizza from scratch right now and consuming it in an hour. Yeast needs to rise. (Hum maybe it was really my lack of patience and not fear after all…well, that will be too much analysis for this post. Okay, back on track). So I started reading a lot of pizza dough recipes and trying a lot of pizza dough recipes (whole wheat still working on, but the toppings have been having some fun with. Ask my sister-in-law, who had to recover here post-op, about the short rib pizza and the broccoli rabe, brussels sprouts & lemon pizza.) And yes, unless you want to fight with the dough, give it the rest time the recipe calls for. Example: last Friday got a hankering to have pizza for dinner (darn you Mark Bittman and coming back to the NY Times Dining Guide last week to get that craving all up and going). Made the dough late morning (and honestly think it was either Wolfgang Puck’s or Peter Reinhart’s recipe, not Bittman’s that day) and yes, should have waited to make the pizza until at least the next day. Not that it does not work, it’s that the dough just does not like to work with you (note: lots of bounce back). After I won that fight, the result, a simple Margarita of roasted tomatoes & garlic, buffalo mozzarella, parmesan and basil, was pizza perfection.

margarita pre-baking

The fight

Fast forward to today (four days after making the dough), and because I keep forgetting  that I can cut the recipe in half, I still have dough in the fridge. Heck, why not make pizza for lunch? Dough ready. Ingredients at hand and ready (thank you warm Spring for arugula and rosemary already up in the garden, sunchokes roasted the other day, and a fridge that is never without lemons). Oven cranked to 500 degrees. Lunch will be ready in less time than I can make a salad. And main reason for that? Not the cooking time (minutes mind you) but that I did not have to fight with the dough. Four days of rest and it succumbed to my touch. Ha, take that!

Sunchoke, Lemon, Rosemary, Pizza
1 ball of prepared (and well rested dough), recipe here courtesy of Peter Reinhart and BHG.com
1/2 cup thinly sliced and roasted sunchokes (potatoes are a good sub)
12 paper thin slices of lemon (or as thin as your knife skills will allow)
1 teaspoon of minced fresh rosemary
1/4 -1/3 cup parmesan
olive oil, for drizzling
1 cup (more if you are like me) fresh arugula

pre-oven and cheese

Preheat oven to 500 degrees. And if you have a pizza stone in the oven all the better (get that dough nice and crisp and cooking quick). Mist baking sheet (if not using the pizza stone) with cooking spray or olive oil.  Stretch ball of dough into a thin disk (either draping over the back of your hands and using your thumbs to turn and stretch the dough, or if well-rested I found just pressing the dough flat on a floured surface works just as well.). Place disk of dough onto baking sheet.
Drizzle olive oil onto of the dough, then place the ingredients on top: sun chokes, then lemons, then rosemary, then the parmesan. Bake for about 7 minutes (again this all depends on your oven, stone, no stone, so anywhere from 5 to 12 minutes. and if you have your own outdoor woodburing pizza oven like my brother, then cooking time is about 3 minutes.). Place arugula on top of pizza once it is out of the oven and if so inclined, drizzle a bit more olive oil on top.

P.S. okay, admittedly, I am now loving pizza. perhaps too much. 

just out of the oven pre-arugula & it cost a lot less than delivery!

Posted in To Market with Mo | Tagged , , , , , , , , , , , , , , | 5 Comments

The ‘Spotted Dog’ or drunken dog?

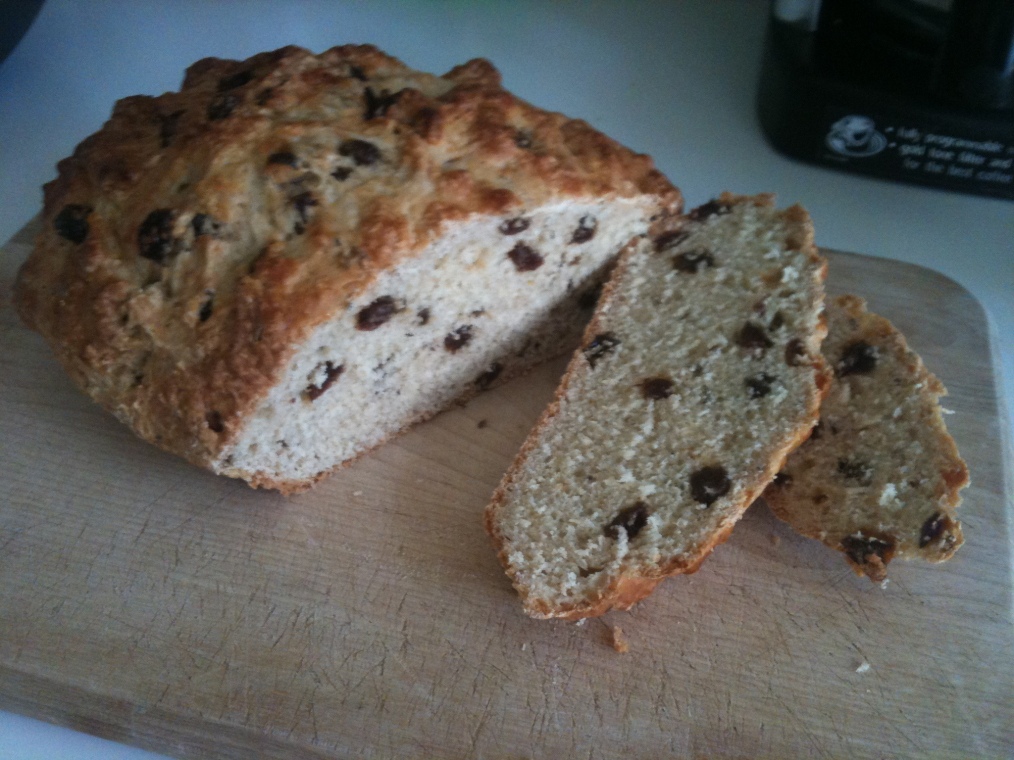
ImageNo, no, no, even though I am a dog lover this blog has not converted from one of food to all canine all the time. No, the ‘spotted dog’ I am referring to is not the one of 101 or the fireman’s best friend, but the one that most Americans would call ‘Irish soda bread.’ A straight up traditional soda bread would not be marred by ‘spots’ (dried raisins or currants) or any kind, just straight up flour, soda (of the bi-carb variety), a bit of salt, and buttermilk and you have your dough (or ‘dog, pssst, slang for dough). Or texture it up a bit and you have Irish brown bread (link to my post on brown bread and homage to soda bread). 

But guessing, cause, we humans hanker for the sweet, raisins, currants and sugar found there way into the soda bread. Some folks have gone as far as adding eggs and butter but that is taking us into cake territory so let’s try to keep it as close to the original as possible shall we? 

Now for years I have kept my recipe for ‘spotted dog’ close to the vest. And to be honest I cannot take full credit for the Tuffy spin on soda bread. No, that credit must go to my father. And like the good fellow of Irish descent that he is, booze found it’s way into our version of soda bread in the form of Irish whiskey.  Genius, right? Image

Our secret?  Macerating (ok, soaking) the currants/raisins in the Irish whiskey so they are nice and plump and drunk.  Having started this ‘secret’ recipe at least 20 years ago (give or take) I have used the same glass clamp jar to soak my raisins in and just keep topping it off year after year — now that is some age and flavor. And to be honest there are times when the raisins start soaking right after I have made the years batch of bread. A full year of bathing in the whiskey. Woo hoo!  

Now, you don’t have to go to such soaking extremes. Heck even a soak for a few hours will do the trick. And if you don’t want to use the booze (shhh, even my tetotaling mother-in-law goes for the boozy version) soak your fruit in a both of hot tea. I just think plumping up the raisins makes such a delicious difference. 

Other than soaking and baking time this is a snap to but together. And so so good with a big ole slather of butter…and maybe a shot of Paddys (insert your Irish whiskey of preference). Slainte!

Tuffy’s Spotted Dog

3 cups white flour
3 Tablespoons sugar (can go heavier to 4-5 if you like)
3 Tablespoons baking powder
1/2 teaspoon baking soda
1-2 Tablespoons caraway seeds (totally optional)
1 cup macerated raisins (cover the raisins in Irish whiskey or tea for at least a couple hours)
1 1/2 cup buttermilk

Preheat oven to 350 degrees. Sift the flour, sugar, baking powder and baking soda together twice. Then mix in the caraway seeds and raisins (drained of the liquid). Then a little at a time start incorporating the buttermilk. Give or take the 1 1/2 cups til you have a dough that is not too too sticky. Knead in the bowl and then continue to knead on a floured board. Shape into a round. Place in a pie tin or 8″ round cake pan. slice a ‘x’ on top and then brush with a bit of buttermilk. Bake for 45-50 minutes.
 Image

Posted in Uncategorized | Tagged , , , , , , , , | 5 Comments